
Documents and files
A LineaForge document is a project: one or more artboards (sheets), each with its own artwork, plus the project's unit, grid, guides and print-and-cut settings. Projects open in tabs above the canvas and are saved as .lf files. This topic covers creating and setting up documents, the File menu, the project format, autosave and recovery, and the grid and guide tools.
Creating a new document
There are three ways to start a document:
- On the Start screen (shown at launch), click a preset or fill in Custom size and click Create. See Getting started.
- Click New in the top toolbar. The New document dialog asks for the Unit, Width and Height (12 × 12 inches to begin with) and opens the document in a new tab when you click Create. The document you were working on stays open in its own tab.
- Click the + button (New project) at the end of the file tab strip above the canvas. This opens a new tab with the same artboard size and unit as the current one, with no dialog.
A new document starts with the grid off, grid and guide snapping off, center snapping on, and the unit and print-and-cut marks you last set up. Closing the last open tab leaves a fresh untitled 12 × 12 inch document rather than an empty window.
Document settings
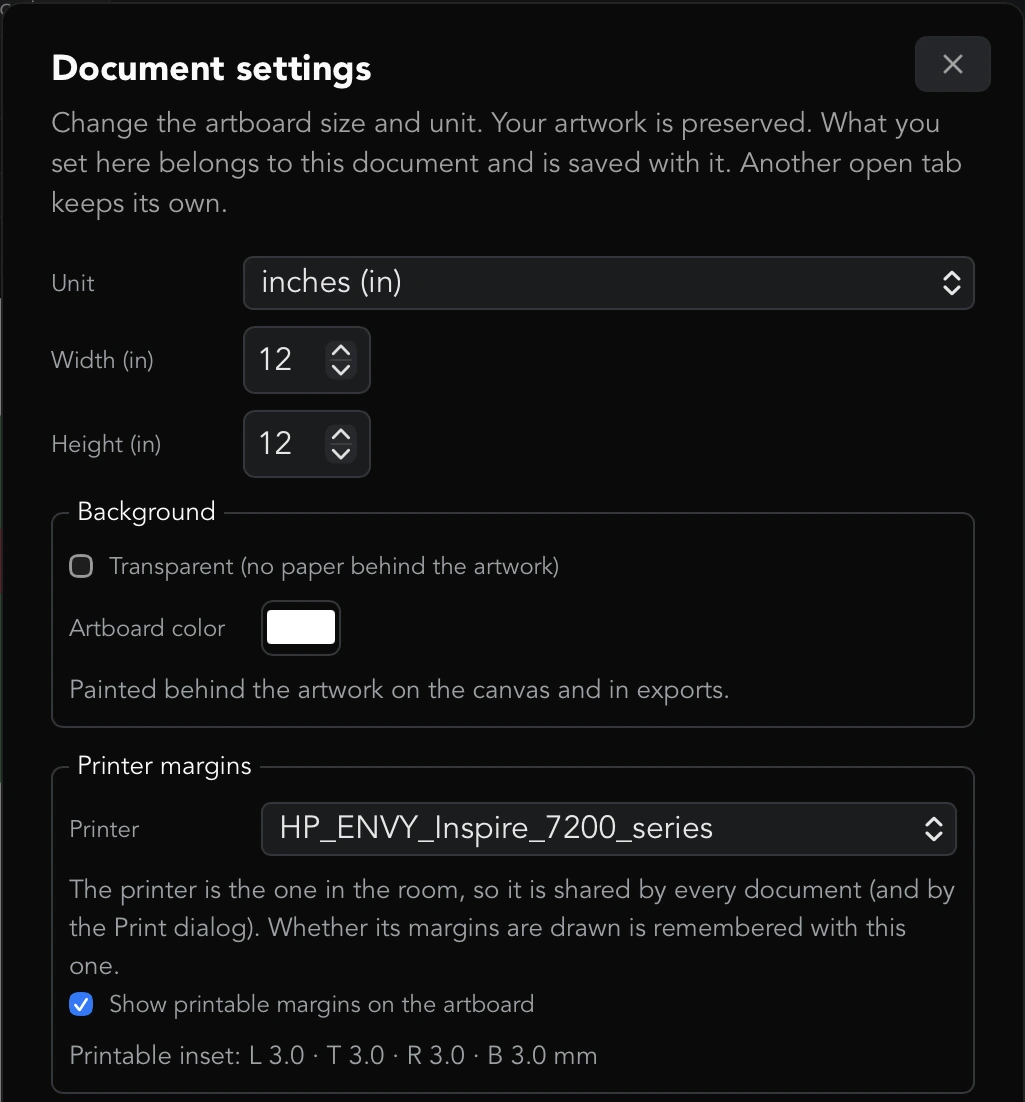
Open File → Document… to change the current document. The dialog is titled Document settings and everything in it belongs to this document: it is saved in the .lf file, and another open tab keeps its own. Click Apply to commit a size or background change, or Cancel to leave the size alone.
Size and unit
Choose the Unit (inches or millimeters), then type the Width and Height. Switching the unit converts the numbers so the physical size stays the same. Resizing the artboard keeps all of your artwork where it is. There are no preset page sizes or an orientation switch in this dialog; type the dimensions you need (swap the width and height to turn the page).
Background
Under Background, tick Transparent (no paper behind the artwork) to show a checkerboard behind the artwork; exports then keep their transparency. Otherwise pick an Artboard color, which is painted behind the artwork on the canvas and in exports.
Print & cut
Whether a document is a print-and-cut job, and the registration marks it prints, are set in the Plotter dialog: click Plot, and on the Output tab tick Registration marks (print & cut) under Print & Cut. The choice and the mark settings still belong to the document and are saved in its .lf file; only the controls live with the rest of the job. See Plotting and cutting.
Printer margins
Pick the Printer whose printable area should be drawn, and tick Show printable margins on the artboard to see it as an overlay. The printer is shared by every document and by the Print dialog, because it is the hardware in the room; whether its margins are drawn is remembered with this document. Only installed printers are listed, and margins may not be available for a driverless queue.
Process record
The process record is evidence of how a piece was made that you can show a client: every edit, when it happened, and where each shape came from (drawn with a tool, typed, traced from an image, or imported from a file, which is named along with its SHA-256 digest).
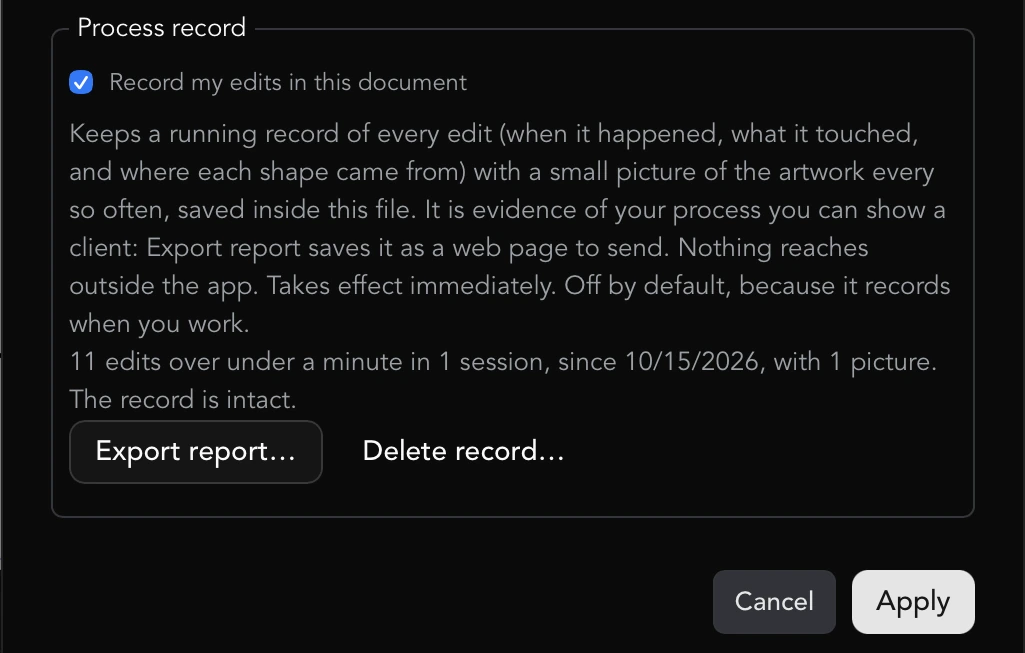
- Record my edits in this document switches it on. It takes effect at once, without Apply. It is off by default, because it records when you work. Switching it on notes what was already on the artboard, and switching it off is noted too, so a gap in the record shows rather than hides.
- While it is on, the app also keeps a small picture of the artwork when recording starts and stops and every so often in between. A long project keeps about sixty pictures, spread evenly across the work.
- Under the checkbox the dialog shows the running figures: edits, time spent editing, sessions, pictures, and whether the record is intact. Each entry carries a hash of the one before it, so an entry that has been removed, reordered or edited afterwards is caught.
- Export report… saves the record as a web page (an
.htmlfile) to send to a client. It opens in any browser and holds everything in one file: the figures, the record check, where the shapes came from, the outside files with their digests, the pictures, the sessions and the full log. Times are shown in your time zone. File → Process report… does the same. - Delete record… removes the record and its pictures from the file and stops recording. It cannot be rebuilt afterwards.
The record is kept inside the .lf file and nothing is sent anywhere. It is evidence of process, not a certificate: no outside service checks or timestamps it, and its times come from your computer's clock.
Projects and tabs
Each open project has a tab in the strip above the canvas. A project is an independent document with its own artboards, undo history and save state.
- Click a tab to switch to it. The view fits the incoming artboard.
- The tab shows the file name, or Untitled 1, Untitled 2 and so on for work that has never been saved. A dot on the tab means it has unsaved changes.
- Drag a tab left or right to reorder the strip.
- Click the × on a tab to close it. If the project has unsaved changes, an Unsaved changes prompt offers Close without saving or Keep open.
- Click + at the end of the strip to start a new project the size of the current artboard.
Every project in the strip is covered by autosave and by the prompt that appears when you close the app, not only the one on screen.
Sheets: several artboards in one project
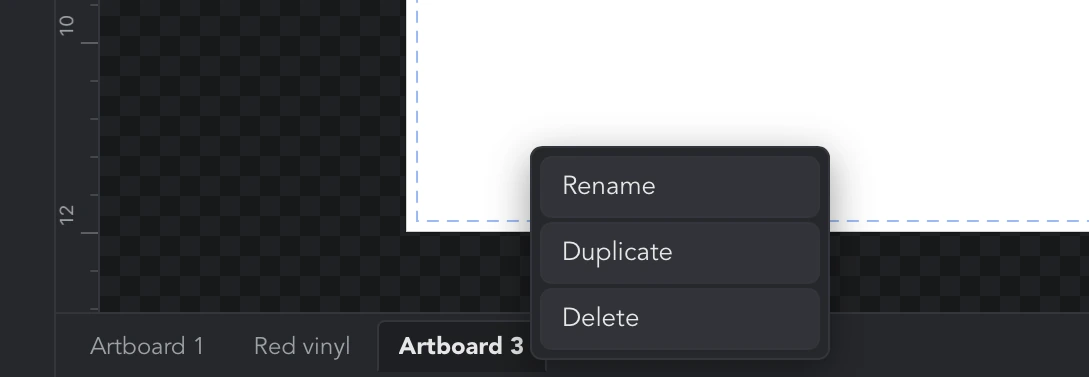
The tab strip below the canvas lists the artboards (sheets) in the active project, named Artboard 1, Artboard 2 and so on until you rename them. All of a project's artboards are saved together in its .lf file.
- Click a sheet tab to switch to it. The view fits the artboard, since sheets can differ in size.
- Double-click a tab to rename it. Press Enter to keep the name or Escape to cancel.
- Click + (Add artboard) to add a sheet the same size as the current one.
- Right-click a tab for Rename, Duplicate and Delete. Deleting a sheet that has artwork on it asks you to confirm with a Delete artboard prompt; a project always keeps at least one sheet, so Delete is unavailable on the last one.
- Drag a tab to reorder the sheets.
The File menu
File in the top toolbar holds the document and file commands. Import and Export open as submenus to the side.
Document…
Opens Document settings for the current project (see above).
Open… (Cmd/Ctrl+O)
Opens a file picker filtered to everything LineaForge can read: .lf projects, SVG, DXF, PDF, EPS, Adobe Illustrator (.ai) and raster images (PNG, JPEG, GIF, BMP, WebP). What happens depends on the file type:
- A
.lfproject opens in its own tab as that document, already saved. - An SVG, DXF, PDF, EPS or AI file opens in its own tab as new untitled work, so it never displaces a project you already have open. Its first Save asks for a location.
- An image is placed into the current document as an image object and selected.
Import
The same as Open…, with the picker filtered to one type: SVG…, DXF…, PDF…, EPS…, Adobe Illustrator… or Image…. Each lands as described above.
An SVG's coordinates carry no physical size, so the app that wrote it decided what they meant. The SVG import DPI setting in Preferences chooses how they are read (72 for Adobe Illustrator, 90 for Inkscape, 96 for Corel Draw or ScanNCut, 100, or 300). Files saved by LineaForge and by Sure Cuts A Lot record their own DPI and ignore this setting. By default an import keeps your artboard and places the artwork on it; turn on Resize artboard to the imported SVG in Preferences if the file's own page size should become the artboard. A DXF arrives as black, unfilled cut lines on one layer. Images are covered in Images.
PDF, EPS and Adobe Illustrator files
These three formats describe a printed page rather than a drawing, and LineaForge reads the vector paths off that page: every filled or stroked shape, with its color, line width, dashes and opacity, in the order it was painted. The page size (a PDF's crop box, an EPS's bounding box) becomes the artboard, at its true physical size, so a letter-size file arrives as a letter-size artboard. A PDF or Illustrator file with several pages or artboards opens with one artboard tab per page.
Some things on a page are not paths and do not come across:
- Text is skipped. Convert text to outlines in the program that made the file before saving it, and it arrives as shapes.
- Images are skipped. Place the image file separately with Import → Image….
- Gradients and patterns keep the shape but not the paint: a gradient-filled shape arrives in the gradient's middle color, a pattern-filled one in mid-gray.
- Clipping masks are not applied, so artwork that was masked arrives whole.
- Hidden layers in a PDF or Illustrator file are left out, as a viewer would leave them out.
An Illustrator file must have been saved with Create PDF Compatible File on (Illustrator's default). Saved without it, the file holds no readable artwork and LineaForge says so. Illustrator 8-and-earlier files, which are PostScript rather than PDF underneath, are read like an EPS. An encrypted (password-protected) PDF cannot be read; save an unprotected copy from a PDF viewer first.
Every imported object records the file's name and digest, as described under Objects, color and layers.
Save (Cmd/Ctrl+S) and Save As… (Shift+Cmd/Ctrl+S)
Save writes the active project to its .lf file. The first save of an untitled project, and every Save As…, opens a picker for the location; the tab's name is offered as the file name. After a successful save the tab's unsaved dot clears and the autosave snapshot is rewritten without that project.
Export
Export writes the design in another format: SVG, PDF, DXF, EPS, STL (3D), PNG, JPEG, WebP or a favicon set, for the Whole artboard or the Selection only. See Export and print.
Process report…
Process report… saves the document's process record as a web page to send to a client. If the document has no record yet, it opens Document settings instead, where Record my edits in this document switches recording on. See Process record, above.
The .lf project format
A .lf file is a plain-text JSON document written by LineaForge. It holds every artboard in the project (the sheets), which one was active, the view setup (grid, snapping, guides) and the document settings (unit, registration marks, margins overlay), under a lineaforge format-version marker. Files written by older builds that lack a section open with that section at its defaults, and the earliest single-artboard files open as a one-sheet project.
Because the file is JSON it can be inspected in a text editor, but it is meant to be edited through LineaForge. Keep your work in .lf files; exports such as SVG or PDF are for other programs and the printer, and importing an exported SVG back is not the same as reopening the project.
Autosave and crash recovery
Autosave keeps a private recovery copy of unsaved work in the app's own data folder. It never writes to your .lf file, so it cannot overwrite a version you saved on purpose.
- It is on by default and takes a snapshot every 2 minutes. Change this in Preferences with Autosave recovery snapshots and Every (minutes) (1 to 60). The dialog also shows the time of the last snapshot in this session.
- Every open tab with unsaved changes is included, not only the one on screen. Blank documents are left out, so a snapshot only exists when there is artwork to recover.
- Saving a project removes it from the snapshot; when nothing is unsaved, the snapshot is cleared.
If LineaForge closes with unsaved changes still in the snapshot, the next launch opens with the Recover unsaved work? prompt before anything else. It names the document (or how many documents, and their names) and how long ago it was autosaved. Click Restore to open the work in tabs, or Discard to delete the snapshot and start fresh. The prompt cannot be dismissed any other way, because discarding destroys the only copy. Restored tabs come back as unsaved, so autosave keeps protecting them until you save.
Saving when you close the app
Quitting LineaForge or closing its window with unsaved changes brings up Save before closing?, which names the documents with unsaved changes. With nothing unsaved the app closes straight away.
- Save (or Save all when several documents are unsaved) writes every unsaved project and then closes. A project that has never been saved asks where to put its file; canceling that picker leaves the app open with everything intact.
- Don't save closes and really discards the work: the recovery snapshot is cleared too, so the next launch does not offer it back.
- Cancel keeps the app open. A fresh recovery snapshot is written at that moment.
If a save fails, the app stays open and the error is shown in the prompt; nothing is lost.
Grid, snapping, rulers and guides
The second row of the top toolbar holds the view aids. All of them except the unit are saved with the document.
Grid
Click Toggle grid to show the grid. Its base cell is 0.5 inch or 10 millimeters, and Smaller grid increments and Larger grid increments halve or double it, from one eighth to sixteen times the base cell; the current spacing is shown between the two buttons. Click the grid-style button to switch between lines and dots. A new document starts with the style and spacing you used last; a file carries its own.
Snapping
Three snaps can be on at once:
- Snap to grid snaps drawing, dragging and node edits to grid points.
- Snap to scaffolding lines snaps to the guides described below.
- Show object centers and snap to them draws a crosshair at each object's center and snaps to it. It starts on in a new document.
Drawing also snaps to the loose ends of open paths (the red dots) whether or not these are on. See Drawing tools.
Rulers and guides
Rulers always run along the top and left of the canvas in the current unit, and follow the pointer as you move. Guides (scaffolding lines) are construction lines that are drawn and snapped to but never exported or cut:
- Drag down from the top ruler to pull out a horizontal guide, or drag right from the left ruler for a vertical one. Release over the canvas to place it, or back over a ruler to cancel.
- Right-click a guide for Delete this guide or Delete all guides.
- To make an angled guide, draw a line with the Line tool, right-click it and choose Guides → Convert lines to guides. The line is consumed and an infinite guide is left in its place. The same submenu also has Delete all guides.
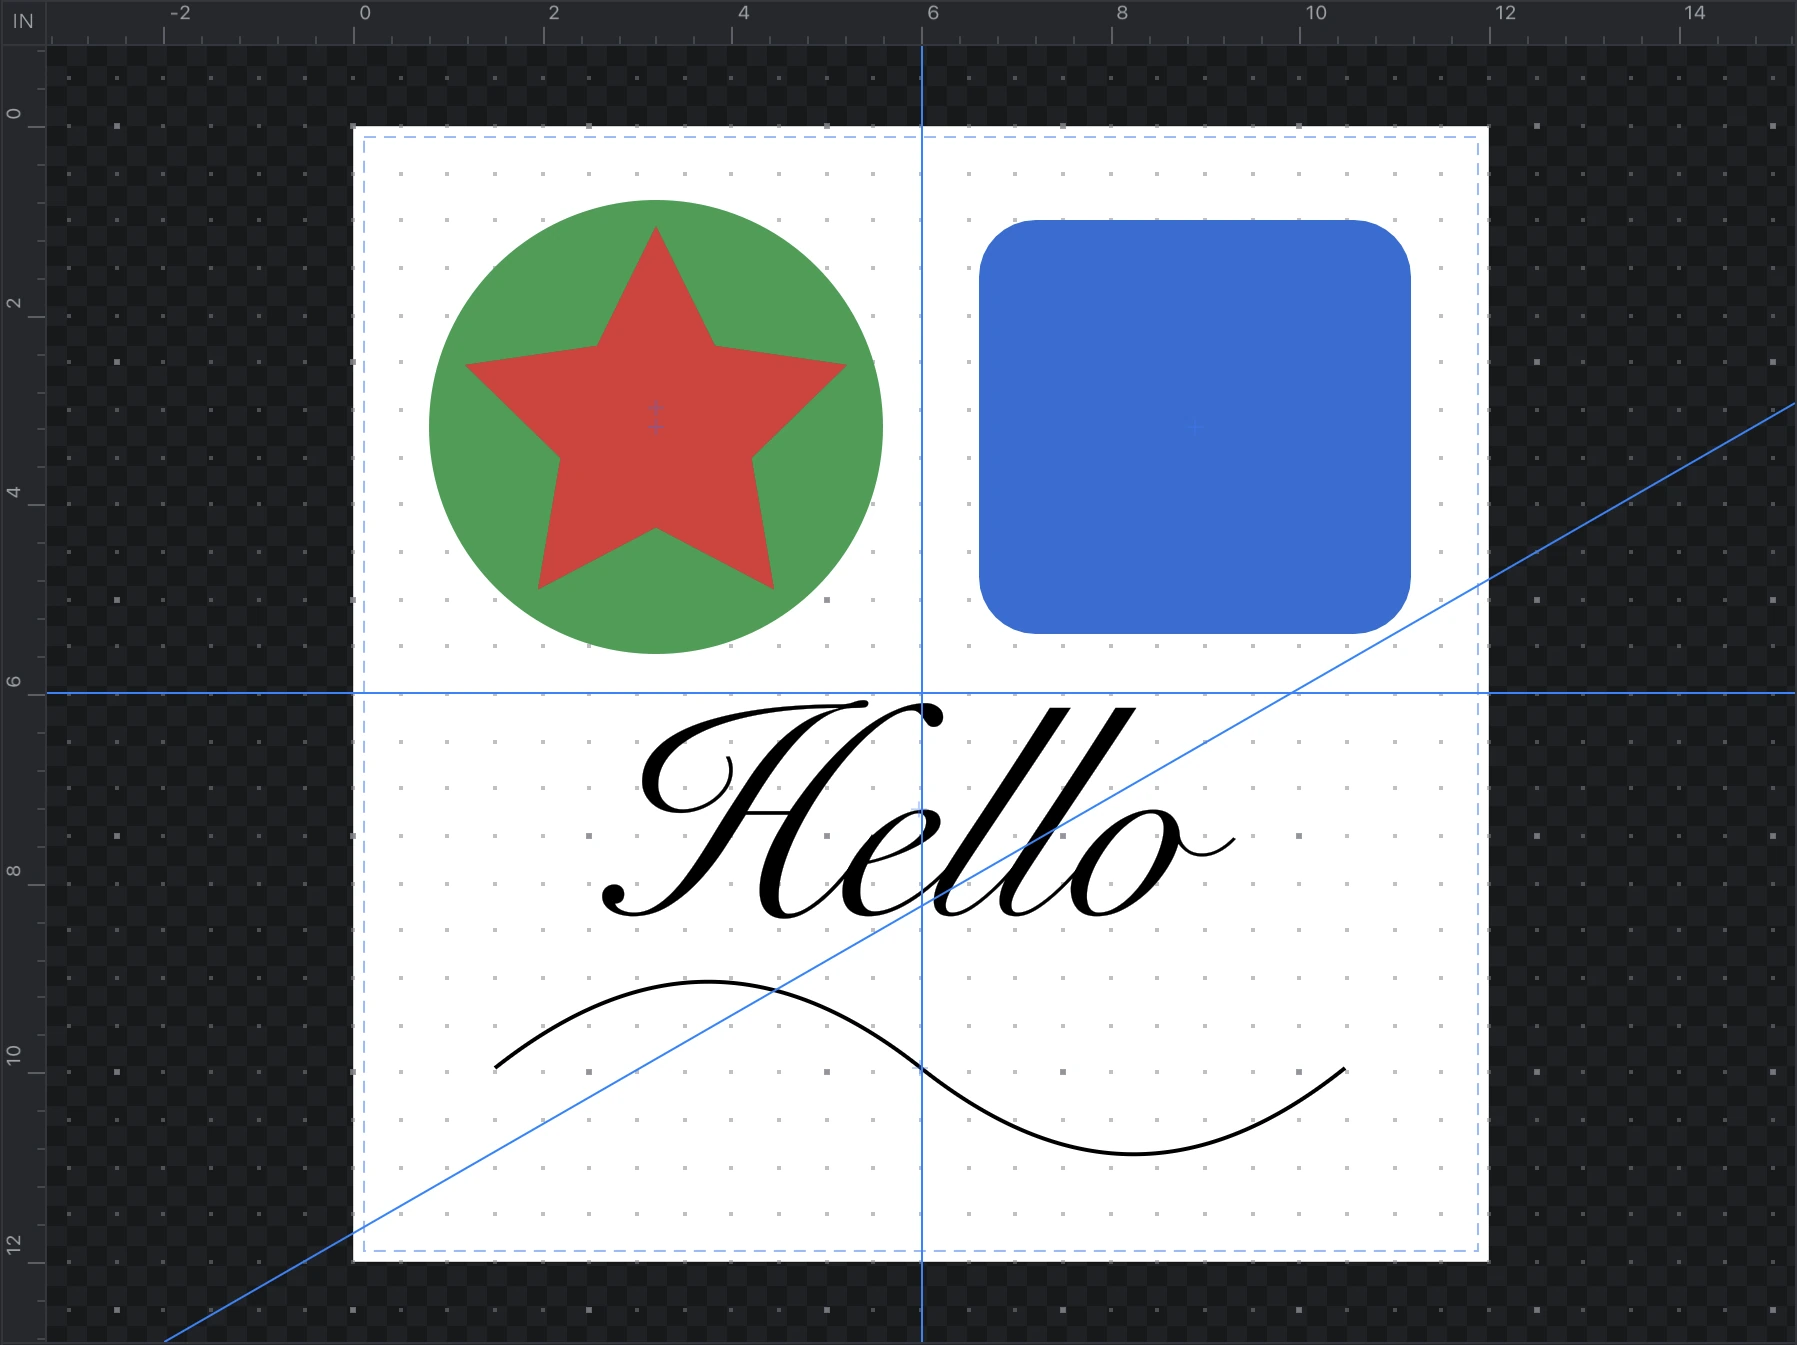
Guides are saved in the .lf file. An import (SVG, DXF, PDF, EPS or AI) carries none.
When a file could not be opened, imported, saved or exported
If a file operation fails, LineaForge shows a dialog titled Could not open "name", Could not import "name", Could not save "name" or Could not export SVG (or the format you chose), with the underlying error quoted below it. The file is left untouched and nothing in your open documents has changed. Click Close and try again, or include the quoted error when reporting the problem. Common causes are a file the importer cannot read, a location you do not have permission to write to, or a disk that is full.